The JJJ&E Logo

Friday, February 1, 2013

Detailing And Weathering A SP Phase 1 GP-9


The GP-9 is a fantastic locomotive to detail and weather. It is unique because all GP-7's, GP-9's GP-18's and GP-20's in N scale have interchangeable parts. This allows you to kit bash many variations of these locomotives when it comes time to kit bash them and detail them. Most modelers don't know that all the parts of the GP-7, GP-9, GP-18 and GP-20 in N scale are interchangeable. I'll be using Sunrise Enterprises detail parts for the GP locomotive. Sunrise Enterprises is no longer in business, but I was able to accumulate many of their different detail parts to use on many SP, ATSF and Southern diesel locomotives on the roster of the "New" JJJ&E. Few manufacturers today specialize in supplying the N scale modeler with quality detail parts.

It was fun to work on the SP GP-9. I detailed two of these locomotives, SP #3509 and SP #3498.  I used a Dremel tool with very fine diamond points to drill the holes for the detail parts on the locomotive shell and frame.

                 Photo  #  1  SP #3509 completely detailed with Sunrise Enterprises detail parts. These parts include MU hoses,     MU Cables Round MU Stands, Antennae, Steam Generators, Rotary Beacons & Stands, High Stacks, Over head Air Tanks, Spare Knuckle Coupler and Speed Recorders. All of these detail parts were used on SP #3509 GP-9 and SP #3498 GP-9.
                                       Photo  #  2  An early color  track side photo of SP # 3508 GP-9 with all the detail parts cemented in place, on the outer mainline track in the Monterrey Mountains.
       Photo  #  3 An early color photo of the fireman's side of the SP #3509 GP-9 showing all the detail parts from this viewing point.. The spare knuckle coupler is mounted on the front truck along with the speed recorder.

Photo  #  4 An early color photo of the SP #3508 GP-9 showing an overhead view of the diesel. The diesel parts on top of the diesel shell are an Antenna, Steam Generator, Rotary Beacon and Stand, High stacks and Air Tanks.


All the detailing of this SP #3509 GP-9 took about 90 minutes to complete. The next step is to weather this diesel with the Bragdon Weathering System. I already added the detail parts to SP #3498 and weathered the locomotive with the Bragdon Weathering System. I'll post these photo's in a few days.

The photo's below are the initial weathering of SP #3498 Phase 1 GP-9 with the Bragdon Weathering System. The weathering can be toned down by brushing the excess weathering powders from the diesel shell.

          Photo  #  5  Initial weathering of the SP #3498 Phase 1 GP-20 with the Bragdon Weathering Powders on the fireman's side of the GP-9 
Photo  # 6  Overhead view of the Initial weathering of the SP #3498 Phase 1 GP-20 with the Bragdon Weathering Powders on the fireman's side of the GP-9 
Photo  #  7  Comparison of a weathered and unweathered SP Phase 1 GP-9 with detail parts added.
              Photo  #  8  Another view of a completely weathered SP Phase 1 GP-9 and an unweathered SP Phase 1 GP-9 with the detail parts added. The weathering of SP #3498 will be toned done in subsequent photo's by using a soft sable brush to remove some of the excess weathering.
Photo   #  9  Closeup of Initial Weathering of SP #3498 with the Bragdon Weathering System
Photo  #  10   Closeup of Initial Weathering of the roof of the SP #3498 with the Bragdon Weathering System


Thursday, January 31, 2013

Detailing And Weathering A SP Phase 1 GP-9


I weathered the detailed SP Phase 1 GP-9 with the Bragdon Weathering System. This was easy to do since I've been using this technique for many yeras. I weathering the vents with a Grimy black soot. The rest of the shell and trucks were weathered with the Grimy black soot, dirt and dust and some rust.

Traditionally SP diesels were heavily weathered and never were cleaned. I detailed # 3509 and #3498. I weathered SP #3498. If you applied too much weathering in any area, the weathering can be toned down with a soft sable brush. That's the beauty of using the Bragdon Weathering System.

              Photo  #  1 Trackside Photo of SP #3498 GP-9 weathered with the Bragdon Weathering Powders. The SP #3498 GP-9 is on the mainline high in the Monterrey Mountains.

        Photo  #  2  SP #3498 GP-9 on the engineers side of the GP-9. I moderately weathered the shell of the SP GP-9 using Grimy black soot on the roof and around the vents  below the roof. The rest of the shell of the GP-9 was weathered with dirt, dust and rust.

   Photo  #  3  Another view of  P #3498 GP-9 on the engineers side of the GP-9. I moderately weathered the shell of the SP GP-9 using Grimy black soot on the roof and around the vents  below the roof. The rest of the shell of the GP-9 was weathered with dirt, dust and rust.

Photo  #  4  An overhead view of the roof of the SP #3498 Phase 1 GP-9 weathered with grimy black soot around the fans

Monday, January 21, 2013

Cheater Boxcars Or Helpers

              
"Cheater" Boxcars are a great addition to N scale railroading . This type of boxcar is powered and aids N scale locomotives especially steam locomotives to negotiate grades of 2% or greater, that many steam locomotives couldn't handle without help.

The "Cheater" boxcars are easy to make and work well on layouts with DCC. In 2004, one of the large hobby shops in Ft. Lauderdale Florida had a "blowout special" on Life Like  UP GP-20's for $16. Needless to say there was a large "run" on these sale price GP-20's. I bought eight of the LL GP-20's which I intended to use for "Cheater" Boxcars or "Helpers" for many of my steam locomotives as the "Original" JJJ&E had a completely graded 120 foot mainline  ( 2% ).

I used the frame of the LL GP-20 as the main component to build the "Cheater" boxcar. I was able to hard wire a Lenz 0521W decoder to the diesel frame and motor.The orange and gray wires of the decoder are soldered to the motor tabs. The red and black wires of the decoder are soldered to the original light board. The led is cut off from the light board and the rear light board is removed from the frame. The decoder is taped to the frame where the rear light board was positioned with Kapton tape. This  Life Like GP-20 wasn't DCC friendly. Front and back lights weren't necessary as the frame was completely covered by a 50 foot boxcar shell. At the time I had some MRC 50 foot boxcar shells that I used for my new motorized "Cheater" boxcars. I was able to install MT N scale couplers at each end of the GP-20 frame.

Now I consisted the "Cheater" boxcar to a steam locomotive that needed extra power. The "Cheater" boxcar provided ample pulling power to aid the steam locomotives, I consisted these to. The Life Like GP-20  is very powerful  in its own right and this Gp-20 can easily pull 20 cars on level track.

I used two 'Cheater" boxcars on the "Original" JJJ&E and they have a presence on the "New" JJJ&E ( See Photo  1 ).

I gave several of the other Life Like GP-20's that I didn't use to friends who wanted to make "Cheater" boxcars or "Helpers" for their own layouts.

Photo  # 1  Two completely weathered 'Cheater" Boxcars on a siding with the Switching Yard in the background.
                      Photo  # 2  A Completely weathered Southern "Cheater" Boxcar on the mainline east of San Marino with the Monterrey Mountains in the background.

           Photo  #  3     An  N  scale coupler mounted to the LL GP -20 frame. This car was weathered using Bragdon Weathering Powders. There are couplers on both ends of this "Cheater" Boxcar.


                  Photo  #  4   A Completely weathered Western Pacific  "Cheater" Boxcar on the mainline east of San Marino with the Monterrey Mountains in the background.


                  Photo  #  5  The WP "Cheater" boxcar in a consist with a ATSF 2-8-8-2 articulated steamer on the mainline in San Marino.

                  Photo  #  6  The Southern "Cheater" boxcar in a consist with a ATSF 2-8-8-2 articulated steamer on the mainline in San Marino.

The "Cheater" Boxcars are easy to assemble. You can use any GP-7, GP-9, GP-18 or GP-20 frames with a 50 foot boxcar shell. All the above N scale diesels have interchangeable parts.


Saturday, January 19, 2013

Weathering Locomotives, Rolling Stock And Buildings With The Bragdon Weathering System

Many years ago I started to use the Bragdon Weathering System to weather locomotives, rolling stock and buildings on the "Original" JJJ&E as well as the "New" JJJ&E which was started in 2009 . The complete Bragdon Weathering System contains 16 colors; light, medium, dark rust and soot, Ash,Grimy Gray,Dust Bowl Brown,Weathered Brown,  Old Yeller,Green Grunge,The Blues, Used Brick,  Lime Morter White,Dark Rail Brown,Old Tuscan and Antique Iron.

These weathering powders are easy to apply with a small 18/0 sable brush. If excess powder drops on your work area, it can be reused.You can leave the powders on the models you weather as is.The weathering powders will remain in place. You can also use Dullcote after applying the powders but that isn't necessary. If you do use Dullcote, you might find it necessary to re-apply the lighter colored powders over the Dullcote to re-establish the full effect of the Bragdon Weathering System.

The weathering powders will adhere to any non-glossy surface. It has no resemblance to chalks. Brushing the weathering powders on a locomotive, rolling stock and buildings give instantaneous results. The weathering powders require no  drying or curing. If you use the weathering powders  carefully; you won't have to replace any of the colors for a long time. According to the company, "The weathering powders are made from real rust and other weathering agents that have been ball milled to a particle size over 100 times finer than chalk and blended with a pressure sensitive, dry adhesive. The Weathering powders will adhere to most surfaces. They are nonmagnetic and nontoxic".

            Photo  # 1  The "Idaho Hotel" a signature building on the "New" JJJ&E was weathering with the Bragdon Weathering Powders over 12 Years ago. This building was used on the "Original" JJJ&E and survived a move from Florida to Texas with the weathering intact.

Photo #  2  The Schultz Gear Factory was completely weathered using the Bragdon Weathering System. This building was also used on the "Original" JJJ&E and also was moved from Florida to Texas with all the weathering still in place.

Photo  # 3 Rolling stock can easily be weathered with the Bragdon Weathering System. Varying degrees of intensity can be accomplished with the weathering powders which stay in place on the model.


Photo  # 3A A sepia photo of Rolling stock can easily be weathered with the Bragdon Weathering System. Varying degrees of intensity can be accomplished with the weathering powders which stay in place on the model.

 Photo  # 3B An old platinum photo of Rolling stock can easily be weathered with the Bragdon Weathering System. Varying degrees of intensity can be accomplished with the weathering powders which stay in place on the model.

Photo  # 3C An old B&W photo of Rolling stock can easily be weathered with the Bragdon Weathering System. Varying degrees of intensity can be accomplished with the weathering powders which stay in place on the model.
Photo  # 4  A highly detailed Southern Ms-4 Mikado is easily weathered with the Bragdon Weathering System. A fine 18/0 sable brush was used to apply the weathering powders. This locomotive was weathered over 10 years ago.
Photo # 5 Closeup photo of the highly detailed and weathered Southern Ms-4 Mikado on the Engineers side.
   Photo # 6 The completely weathered Southern Ms-4  Mikado #4910 on the outer mainline  track. Another Southern Ms-4 Mikado on the inner mainline track that is very lightly weathered with the Bragdon Weathering System.
 You should give this system a try. A small 16 color kit is $37.50 USD.

Sunday, December 30, 2012

Micro Ace 0-6-6-0, A Magnificent Steam Locomotive

Many years ago I was able to purchase eight Micro-Ace 0-6-6-0's at a very reasonable cost per locomotive. Four were Micro-Ace A0651's and four were Micro-Ace A0652's. My cost per locomotive was slightly over $100 per locomotive. Today these locomotives cost significantly more since they are no longer in production and they have significant appeal to many N scale modelers.

The Micro-Ace 0-6-6-0 is much smaller than most N scale steam locomotives with similar wheel configurations. Aside from that, the 0-6-6-0 out performs most American steam locomotives. The Micro-Ace 0-6-6-0 has a typical Japanese look with a much smaller tender. The tender also has a rear truck with only one axle. ( See Photo # 1)

Photo  # 1  Micro-Ace A0651 With A Typical Japanese Configuration
Despite the look of this locomotive, the Micro-Ace 0-6-6-0 can be easily Americanized. The first thing I did with this locomotive was to install Lenz min silver decoders in several of these locomotives. The installation was similar to the decoder installation in the kato Mikado. Once the motor is isolated the rest of the decoder installation was a snap.

I Americanized one Micro-Ace A0651 and one Micro-Ace A0652.  I decided to use a Spectrum long tender for each locomotive. This was an easy process and was easy to do once the original draw bar of of the 0-6-6-0 was lengthened and was connected to the long tender. I changed the front pilot of the Micro-Ace A0651 by using a front pilot from A Spectrum 2-6-6-2. Brass detail parts were added to each locomotive. This was easily bonded to the front pilot of the 0-6-6-0. I installed a MT Z scale #905 coupler on the new front pilot of the 0-6-6-0.
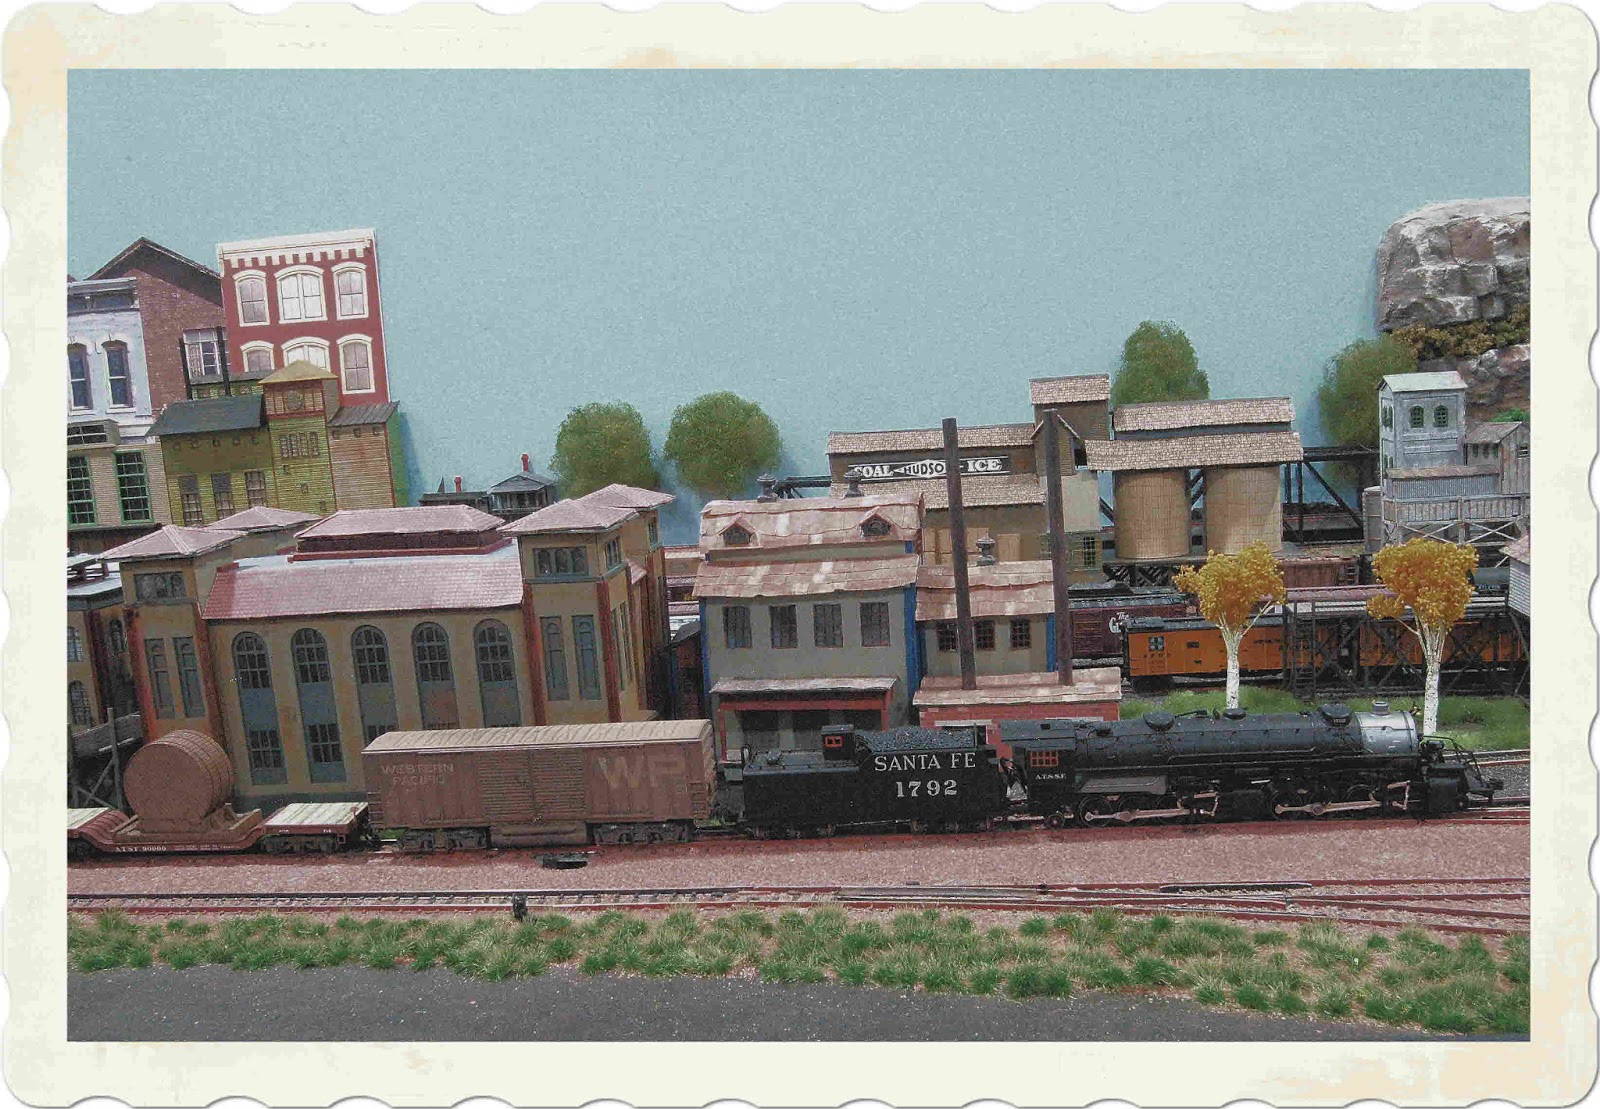
I changed the side panels under the cab of the locomotive as well. MT Z scale couplers were also installed on the rear of the new long tender. New decals were added and the ATSF road numbers now identify the 0-6-6-0. Before the decals were added , each locomotive and tender were repainted. (See Photo # 2 & Photo # 3).

Photo  # 2 Engineers Side Of Americanized Micro-Ace A0651

Photo  # 3 Fireman's Side Of Americanized Micro-Ace A0651

When working on the Micro-Ace A0652, I added many pewter detail parts. For the front pilot I used a pewter detail part from one of the GHQ detail kits for a Kato Mikado. MT Z scale #905 couplers were placed in the front pilot and on the rear of the long tender. I also added a Soundtraxx Micro-Tsunami sound decoder and mini oval speaker inside the tender along with a Lenz mini silver decoder for motor functions. I used two decoders as I normally do when I use sound in N scale as I am not fond of the motor functions of the Soundtraxx Micro Tsunami decoder. (See Photo # 4 & Photo # 5).

Photo # 4 Engineers Side Of Americanized Micro-Ace A0652

Photo  # 5 Fireman's Side Of Americanized Micro-Ace A0652
If any of these Micro-Ace 0-6-6-0's becomes available on various auction sites, hobby shops or train shows, they are well worth purchasing.

Versatility And Flexibility Of Unitrack


Contrary to some opinions, Unitrack is very versatile and flexible when you design a layout. There is no limit to your creativity when you work with Unitrack in designing a track plan. You are not limited to a pre-set track plan and if you use your imagination you can create any track plan for any sized space.

Just because Unitrack is sectional, doesn't lend itself to any limitations. The cost of Unitrack is comparable to any other track once you consider the cost of a sub roadbed and roadbed.

The Unitrack turnouts operate flawlessly and you can run trains for hours at a time without track issues or derailments.

The Unitrack remains cleaner for longer periods of time than most other brands of track due to the composition of the rails. On average, you can run trains for two to three months at a time or longer without cleaning the rails. I don't think you can say that about any other brand of track.There are many other positives to Unitrack that have been mentioned in other threads on different forum groups and most of you know all the positives of Unitrack  or you wouldn't be using it.

Unitrack is used by beginners as well as very experienced modelers for the reasons mentioned above.

Just enjoy the running of your trains on Unitrack. It's a great experience.

Thursday, December 6, 2012

Detailing Rolling Stock And Locomotives With Air Hoses


Unlike HO scale, N scale rolling stock and locomotives rarely come outfitted with air hoses next to the coupler box. This is a nice detail to add and can easily be done on selected freight cars and locomotives.

BLMA and Precision Scale are two companies that make air hoses. Precision Scale makes brass air hoses and BLMA makes plastic air hoses. The air hoses can easily be added to freight cars and locomotives by attaching the air hose to the side of the coupler box with a pin head amount of CA cement in either a piece of rolling stock or a locomotive. The air hoses can also be glued yo the underside of the car frames adjacent to the coupler box.

I do prefer the Precision Scale brass air hoses as the BLMA plastic air hoses have a tendency to break if a car is accidentally derailed. The Precision Scale brass air hoses are much more expensive than the BLMA plastic air hoses, but they have more durability and rarely fail if a car is derailed.

Below is BLMA's line of plastic air hoses. They come in packages of 24 priced at approximately $4.75/package.

Photo  # 1 BLMA Air Hose On On Diesel

Below are some photo's of rolling stock of the JJJ&E that have BLMA air hoses added. The brass air hoses are more durable than the plastic air hoses. However if you mount the air hose correctly, the plastic air hoses are very serviceable.

Photo  # 2 BLMA Air Hose Cemented Near Coupler Box On Forty Foot UP Boxcar
Photo  # 3 BLMA Air Hose On ATSF Boxcar
Photo  # 4 BLMA Air Hose On ATSF 40' Boxcar

Wednesday, November 28, 2012

Wiring Of Unitrack Switches/Turnouts, Double Crossovers, 15 Degree and 90 Degree Crossovers


Did you ever have a locomotive stall while passing through a turnout, double crossover or 15 degree crossover? If the answer is yes, there is nothing wrong with the locomotive. Chances are, you haven't wired the turnout, double crossover or 15 degree crossover properly.

If there is only one set of feeders wired to any of these four types of track, you must change the wiring. Even worse, if none of the above mentioned tracks have a set of feeders, it's time to re-evaluate your wiring technique.

To create trouble free operation, these tracks should enough feeders to prevent a locomotive from momentarily or even permanently stalling on any of these tracks.

Unitrack # 6 and # 4 Switches/Turnouts - Each arm of the switch/turnout should be wired with a set of feeders. That means the switch/turnout should have three sets of feeders to provide optimum conductivity.

Unitrack Double Crossover - The double crossover should have four sets of feeder. On set for each arm of the double crossover.

15 And 90 Degree Crossovers - The 15 degree and 90 degree crossovers like the double crossover needs four sets of feeders. One set of feeders should be wired to each arm of the crossover.

Note ** - The feeders have to be wired to common bus lines.

If you wire the above tracks with the correct number of feeders, you'll have no problems  locomotive as it passes over these tracks.You'll never have any electrical issues with the proper wiring of Unitrack #6 and #4 switches/turnouts, double crossovers, and 15 degree or 90 degree crossovers.

Sunday, November 25, 2012

Old Time Classic Photo's Of The Locomotives On The Roster Of The "New" JJJ&E


Old Time Classic Photo's Of The Locomotives On The Roster Of The "New" JJJ&E    ( Continued )


  An old time classic closeup photo of a Southern Ms-4 Mikado #4839 on the engineers side of the locomotive. The Feed Water heater and its associated piping is very elaborate. This locomotive was kit bashed from a generic Kato Mikado using a GHQ pewter detail kit. The weight of this locomotive has more than doubled due to the pewter castings and #4839 will pull over 40 cars on level track.

An old time classic closeup view of the Tool box of the Southern Ms-4 Mikado tender. The tool box is actually an A-Line 7 gram weight which improves the tracking of the tender and is cemented to the underframe of the tender between the trucks.
Despite 12 tornado's surrounding the "new" JJJ&E yesterday afternoon, this classic old time photo shows two Southern Ms-4 Mikado's, #4910 & #4839 on main line tracks in San Marino. Both locomotives were kit bashed from generic Kato Mikado's using GHQ pewter detail kits. This photo was taken at high noon....
An old time classic photo of a completely detailed and weathered Southern Ms-4 Mikado #4910 on the mainline with the town of San Marino in the background.
An old time classic closeup photo of a completely weathered Southern Ms-4 Mikado #4910 in the center of San Marino. This locomotive was kit bashed from a generic Kato Mikado using a GHQ pewter detail kit.
An old time classic panoramic photo of a Southern Ms-4 Mikado #4839 and freight consist on the inner mainline track in the center of San Marino.


Thursday, November 22, 2012

Create Better Tracking Of Steam Locomotive Tenders


Steam locomotive tenders are often very light in terms of weight. To get better tracking of the tender, take a 7 gram A-Line lead weight and cement it to the underframe of the tender equidistant between the two tender trucks. Now use some CA cement to glue the A-Line weight in position.

Photo  # 1 Closeup view of the tool box (A-Line 7 gram lead weight placed under the frame of the tender between the two trucks).
Photo  #  2  Seven Gram A-Line lead weight cemented to the under frame of the CB&Q 0-4 Mikado tender between the two trucks,
Make sure there is enough clearance between the two tender trucks.
When the A-Line Weight is cemented in position and the CA cement is dry, take some Polly Scale Grimy Black Paint or Polly Scale Brunswick Green Paint and paint the A-Line 7 gram weight. Now you've turned the A-Line Weight into a tool box and have also added 7 grams of weight to give the tender better tracking.

Yoyu can also add weight inside the tender where ever possible. Loon weights are a good choice as well as soft lead weights.

If you use DCC, you can place a decoder and speaker inside the tender shell. Now you have a tender with a decoder and speaker inside the tender shell and a tool box err, I mean 7 grams of weight added to the tender in a very strategic position, between the two tender trucks....

This really works out well...... and solves tracking  problems.